 Aura: Looksmaxxing
 How to Get a Clean Shave: Step-by-Step Guide
Learn how to get a clean shave with the right prep, technique, and aftercare. Practical steps for a smooth, irritation-free result every time.

A clean shave is one of the highest-ROI grooming habits available to any man. Done right, it sharpens your facial structure, improves skin texture over time, and signals that you pay attention to detail. Done wrong, it leaves you with razor burn, ingrown hairs, and a patchy finish that undermines the whole effort.
This guide covers every stage of the process, from prep to aftercare, with enough specificity to actually make a difference.
Why Most Shaves Fall Short
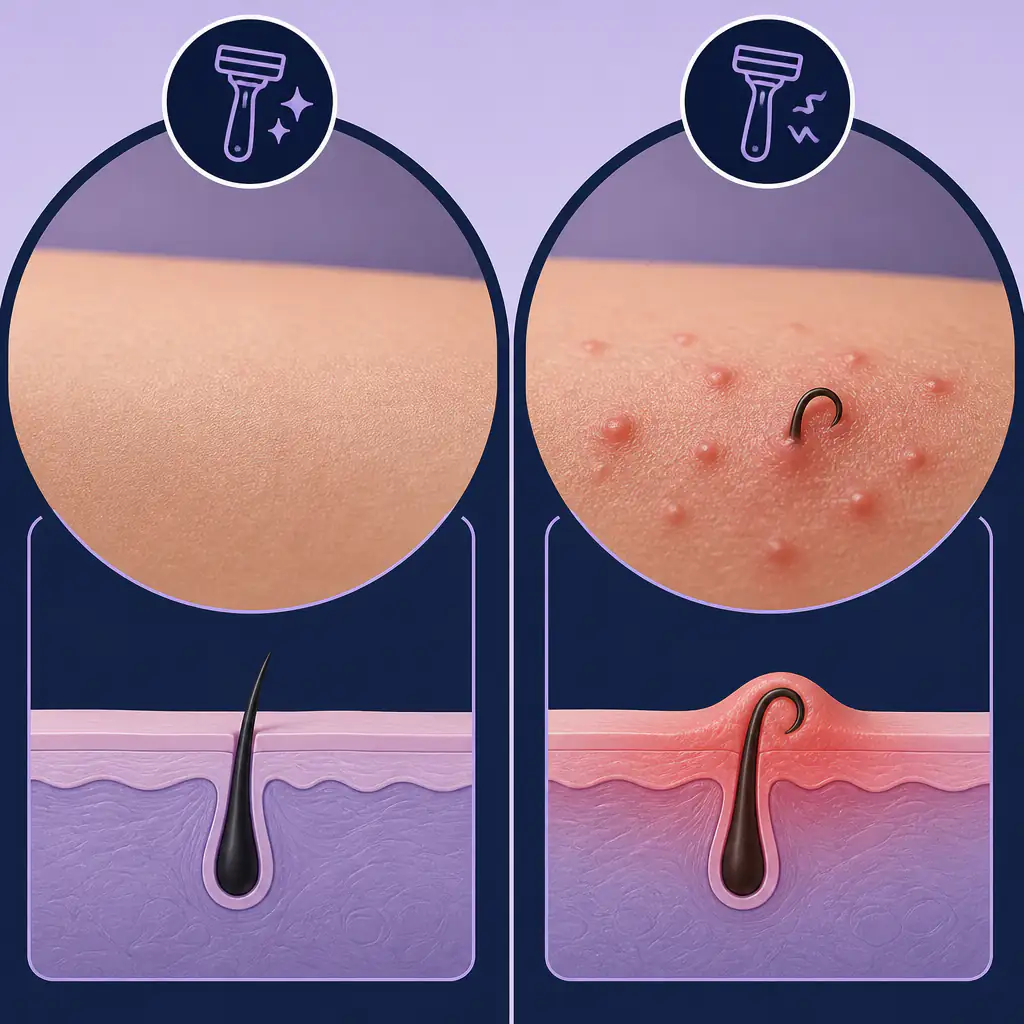
The majority of shaving problems trace back to one of three causes: inadequate skin preparation, poor blade mechanics, or skipped aftercare. Razor burn (technically a form of contact dermatitis), folliculitis (inflammation around the hair follicle), and pseudofolliculitis barbae (ingrown hairs from curled, cut hair tips re-entering the skin) are all largely preventable.
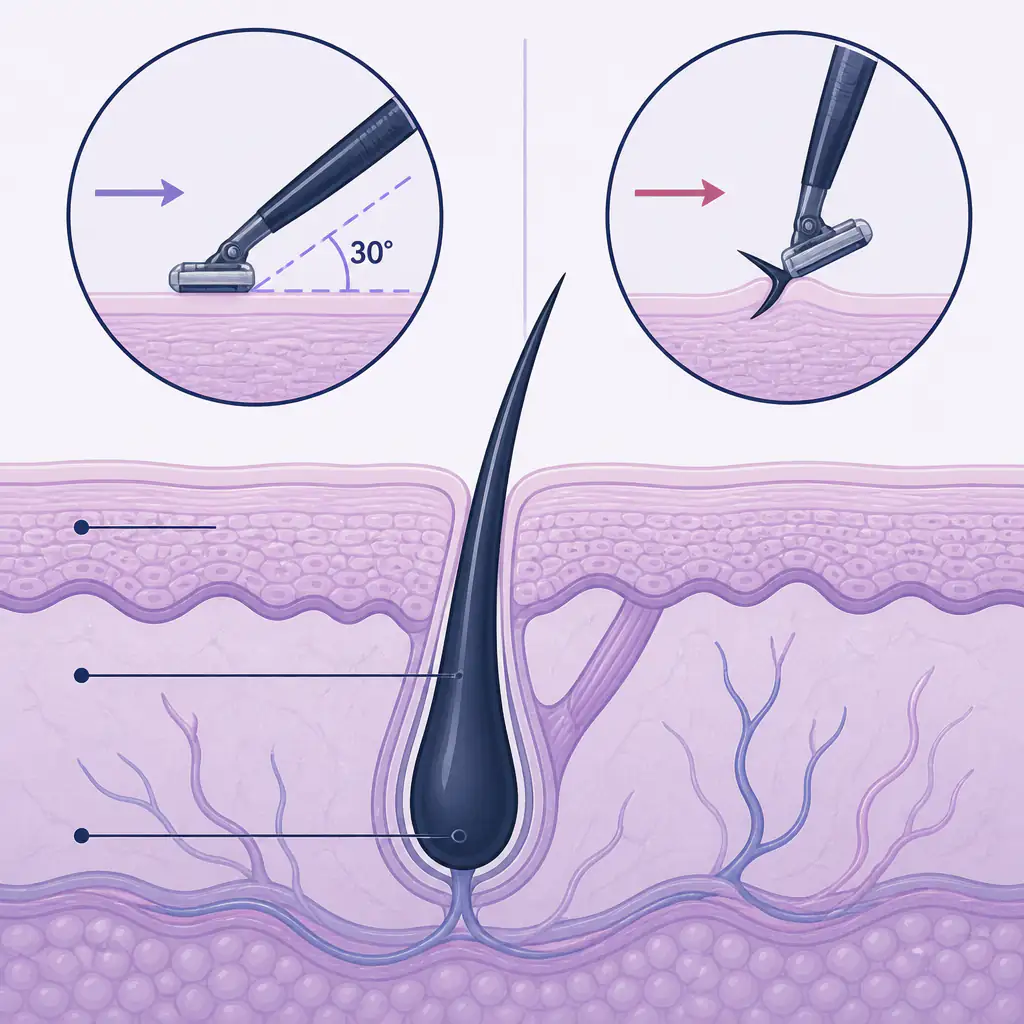
Understanding the structure of your facial hair helps. Each strand grows from a follicle at an angle specific to that region of your face. The hair on your neck, for example, often grows in a different direction than hair on your cheeks or chin. Cutting against that grain without proper preparation drags and tears rather than slices cleanly, which is the root cause of most irritation.
What You Need Before You Start
You do not need an elaborate kit. You need the right tools, in good condition.
Razor Options
- Cartridge razor (multi-blade): Convenient, widely available. The multiple blades lift and cut hair in sequence, which can cause more sub-surface cuts on sensitive skin. Change cartridges every 5 to 7 shaves.
- Double-edge safety razor (DE razor): A single sharp blade, heavier handle for better weight distribution. Higher learning curve, but many shavers report significantly less irritation once technique is dialed in.
- Straight razor: Maximum blade control and the closest possible shave. Requires real skill and maintenance. Not recommended as a starting point.
- Electric foil or rotary shaver: Not a replacement for a wet shave in terms of closeness, but useful for quick maintenance passes.
For most people learning how to get a clean shave, a quality cartridge razor or a DE razor are the practical starting points.
Shaving Products
- Shaving cream or soap: Creates a lubricating layer that reduces friction between blade and skin. Avoid foams in aerosol cans if possible since they tend to dry faster and offer less cushion.
- Pre-shave oil (optional): Applied under shaving cream, it softens the stubble and adds an extra layer of glide. Useful for coarse or dense beard hair.
- Aftershave balm or lotion: Not optional. More on this below.
- A shaving brush: Helps build a richer lather and lifts hair slightly away from the skin, making cutting more efficient.
Step-by-Step: How to Get a Clean Shave
Follow these steps in order. Skipping prep is the single most common reason a shave goes wrong.
Step 1: Soften the Skin and Hair
Shave after a warm shower or apply a warm, damp towel to your face for 60 to 90 seconds. Heat causes the skin to expand slightly and softens the keratin structure of the hair shaft, reducing the cutting resistance of the blade by a meaningful amount. Cold, dry skin and stiff hair require more pressure from the razor, which directly increases irritation risk.
Step 2: Apply Pre-Shave Oil (If Using)
Work a few drops of pre-shave oil into the stubble area with your fingertips. Let it sit for 30 seconds before applying lather on top. Argan, jojoba, and castor oil are commonly used bases. This step matters most for men with coarse, dense, or curly facial hair.
Step 3: Build and Apply Your Lather
If using a brush, wet it with warm water, tap out excess, and work it in circular motions against your shaving soap or cream until the lather thickens. Apply it in circular motions against the grain to lift the hairs, then smooth it flat. The lather layer should be thick enough that you cannot see the skin beneath it clearly.
If using a cream directly, apply with fingertips in a similar upward, circular motion.
Step 4: Map Your Grain
Before the first stroke, you should know the direction your beard hair grows in each zone. Common zones to check:
- Cheeks: Usually grow downward, sometimes slightly backward toward the ear.
- Upper lip: Typically grows downward and slightly outward.
- Chin: Often grows downward, but the area directly under the chin may grow upward or sideways.
- Neck: This is where grain direction is most variable and most important. Growing direction here frequently changes mid-neck and often grows upward toward the jaw.
Run a finger across your stubble to feel the direction. With the grain feels smooth; against the grain has resistance.
Step 5: Shave in Passes
A clean, close shave is built in passes, not in one aggressive stroke.
- First pass: with the grain (WTG). Use light, short strokes. Let the weight of the razor do the work, especially with a safety razor. Rinse the blade after every two or three strokes.
- Relather, then second pass: across the grain (XTG). Shaving at a 90-degree angle to the hair growth direction removes more hair without the full irritation risk of a full against-the-grain pass.
- Optional third pass: against the grain (ATG). Only add this if your skin tolerates the previous passes well. This gets the closest result but carries the highest irritation risk. Apply fresh lather before this pass.
Blade angle matters considerably with a safety razor. The optimal cutting angle is roughly 30 degrees from the skin surface. Too steep or too shallow and the blade will not cut efficiently.
Step 6: Handle Problem Areas With Care
The jaw angle, the area under the nose, and the sides of the neck are where most cuts and irritation occur. Use shorter strokes, reduce pressure, and re-lather if the area dries out. For the jaw angle, pull the skin taut with your free hand to flatten the surface.
Step 7: Rinse With Cold Water
After all passes, rinse thoroughly with cold water. Cold water constricts the pores and reduces surface inflammation. Pat dry with a clean towel. Do not drag the towel across your face.
Step 8: Apply Aftershave Balm
This step is not optional. Shaving removes a microscopic layer of skin cells along with the hair, which means your skin barrier is temporarily compromised. An aftershave balm with ingredients like allantoin, niacinamide, panthenol, or aloe vera helps restore that barrier and calm any low-level inflammation.
Alcohol-heavy aftershave splashes are fine for men with oily, resilient skin, but they strip moisture from dry or sensitive skin. Match your aftershave product to your skin type.
Common Mistakes and How to Fix Them
Using Too Much Pressure
With a cartridge razor, the spring-loaded head compensates for uneven skin. With a safety or straight razor, adding pressure actively increases the chance of nicks and irritation. The handle weight alone should provide enough force. If you find yourself pressing down, slow down and check your blade angle.
Shaving Dry or With Insufficient Lather
This is the most common cause of razor burn. If your lather starts to dry out mid-pass, apply more product before continuing. Never do a dry pass.
Using a Dull Blade
A dull blade drags across the skin instead of cutting cleanly. Dragging causes lateral traction on the follicle, contributing to irritation and ingrown hairs. Cartridge razors should be replaced every 5 to 7 uses. A DE blade, which is a single thin metal edge, typically lasts 3 to 5 uses depending on the coarseness of your hair.
Some men try to extend blade life by storing the razor with the blade submerged in mineral oil or baby oil between uses. This reduces oxidation and can marginally extend sharpness.
Shaving Against the Grain Without Preparation
An ATG pass on unprepared skin is the fastest path to pseudofolliculitis barbae, particularly for men with coarser or curlier hair. Always complete a WTG pass first, relather, and only attempt ATG if the previous passes have not already irritated the skin.
Skin Type Considerations
Not all skin responds to shaving the same way. Adjusting your approach based on your skin type matters.
- Oily skin: More tolerant of additional passes and ATG shaving. Can handle astringent aftershave products. May benefit from a salicylic acid toner applied 12 hours after shaving.
- Dry skin: Prioritize pre-shave oil and a balm-based aftershave. Limit to two passes. Avoid any alcohol-heavy products post-shave.
- Sensitive skin: Consider fragrance-free shaving products. Single-blade razors (DE) often cause less cumulative irritation than multi-blade cartridges. Patch test new products before full use.
- Skin with active acne: Shaving over active breakouts carries infection risk. Use short, careful strokes. Never shave over open lesions. Consider switching to an electric razor temporarily during active flare-ups.
If you want an objective starting point for understanding how your current grooming habits affect your overall facial appearance, tools like Aura can provide a baseline analysis of your facial structure, including jawline definition and symmetry, that helps you understand what grooming adjustments will have the most visible impact.
Aftercare and Long-Term Skin Health
A clean shave is a short-term result. Consistent skin health is what makes the difference over time.
- Moisturize daily, not just after shaving. A basic moisturizer with SPF in the morning and a heavier balm or ceramide-based product at night builds the kind of skin barrier that handles shaving stress better.
- Exfoliate once or twice a week with a gentle chemical exfoliant (glycolic or lactic acid) or a soft physical scrub. This reduces dead skin cell buildup that contributes to ingrown hairs.
- Stay hydrated. Skin that is well-hydrated at a cellular level is plumper, which provides a more even surface for the razor.
- Avoid shaving the same area multiple times in one session unless you have applied fresh lather each time.
Building a Consistent Routine
The difference between an occasional clean shave and a consistent one is habit stacking. Attaching your shave routine to an existing anchor, like your morning shower or a specific time of day, removes the decision-making friction that leads to rushed shaves.
Track the results of any changes you make. If you switch from a cartridge to a DE razor, give yourself at least two to three weeks before evaluating the result. Skin adapts, technique improves, and early irritation often resolves once you stop introducing pressure and angle errors.
For men who are working on broader facial grooming goals, a structured approach works better than random adjustments. Some users of Aura find it useful to assess their facial features before and after grooming changes, since the app’s jawline and facial structure analysis can help clarify whether a shaving style or stubble length is actually working in their favor structurally.
Practical Tips Summary
- Always prep with heat before shaving.
- Map your grain before the first pass.
- Use two to three passes, starting with the grain.
- Replace blades more often than feels necessary.
- Never shave dry or with thin lather.
- Finish with a balm, not just a splash.
- Exfoliate between shaves to prevent ingrown hairs.
- Match your products to your skin type, not a general recommendation.
Frequently asked questions
How do I get a clean shave without irritation? +
Prep your skin with warm water or a warm towel before shaving, use a sharp blade with adequate lather, and shave with the grain on your first pass. Finish with a moisturizing aftershave balm to support the skin barrier. Skipping any of these steps, especially prep and aftercare, is usually what causes irritation.
Is a safety razor better than a cartridge razor for a clean shave? +
Many men report less irritation with a double-edge safety razor once they have learned the correct angle and pressure. Cartridge razors are easier to use correctly from the start but can cause more sub-surface cutting due to multiple blades lifting the hair before cutting. The best razor is the one you use consistently with good technique.
How often should I replace my razor blade? +
Cartridge razors should be replaced every 5 to 7 shaves. A double-edge safety blade typically lasts 3 to 5 shaves depending on how coarse your beard is. A dull blade drags instead of cutting, which is a primary cause of razor burn and ingrown hairs.
Should I shave against the grain for a closer shave? +
Shaving against the grain does produce a closer result, but it also carries a higher risk of irritation and ingrown hairs, particularly on the neck. If you want to include an against-the-grain pass, always complete a with-the-grain pass first, apply fresh lather, and only proceed if your skin is not already showing irritation from the earlier passes.